Generative Art Guide For NFTs
Utilizing an algorithm to generate unique art has enabled Web3 artists to scale their works and build diverse communities. Note that this tutorial is designed for artists that already have some base layers to build with.
Prerequisites
Once you have the following dependencies installed, you’ll be on your way to building an NFT collection. For more detailed instructions, click the Youtube links below, and for additional tech support, please do not hesitate to reach out to us on the Telos Discord or Telegram channels.
Note: M1 Mac users:
Users running macOS with the M1 chip will need to install Rosetta to support Intel-based apps on the M1 processor.
- Step 1. Install Rosetta.
Open the terminal on macOS, and enter:
softwareupdate --install-rosetta. For a guided tutorial, click here. - Step 2. Enable Rosetta here
- Step 3. Install Node version 14.17.3. You can find a tutorial for installing Node here
- Step 4. Install Yarn (package manager): Enter
npm install -g yarninto your terminal and press enter.
Make sure you are using Node version 14.18.3 or less
nvm use 14 // To ensure you are running the correct node version
- Check which version you have:
node -v - To make sure you are running the correct node version:
nvm use 14 - You will require this tool to download packages:
npm install yarn
- Code editor: Visual Studio Code is ideal and can be downloaded here.
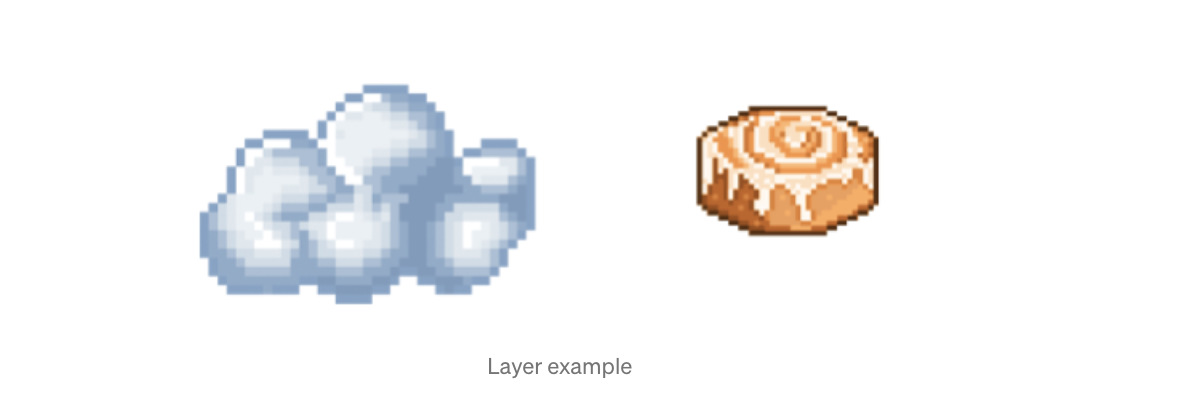
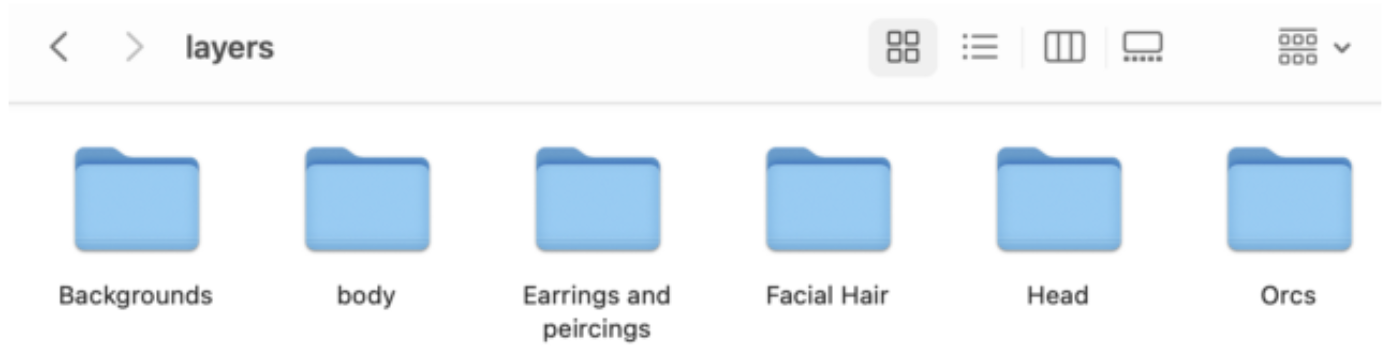
- Images for each "layer" of your NFTs: A layer is a folder that contains individual images for each component of your NFT (i.e., Background, Head)
This tutorial leverages the HashLips_art_engine, which includes both the canvas API and node.js. Hashlips library HERE
Coding Walkthrough
Step 1: Download the source code on your local machine.
To download via Git (Command Line) enter the command below in the terminal: git clone https://github.com/HashLips/hashlips_art_engine.git
Or download the .zip file here
Step 2: Open this folder in Visual Studio Code or your preferred IDE.
This code may look intimidating. However, we are only making a few minor adjustments.
Step 3: Install dependencies (Canvas API).
`yarn add all or npm i'// yarn tends to work better
Step 4: Understanding the folder structure.
- Scroll down to the
config.jsscript
Here is where the majority of work will be done. First, scroll down to the "layerConfigurations" code block.
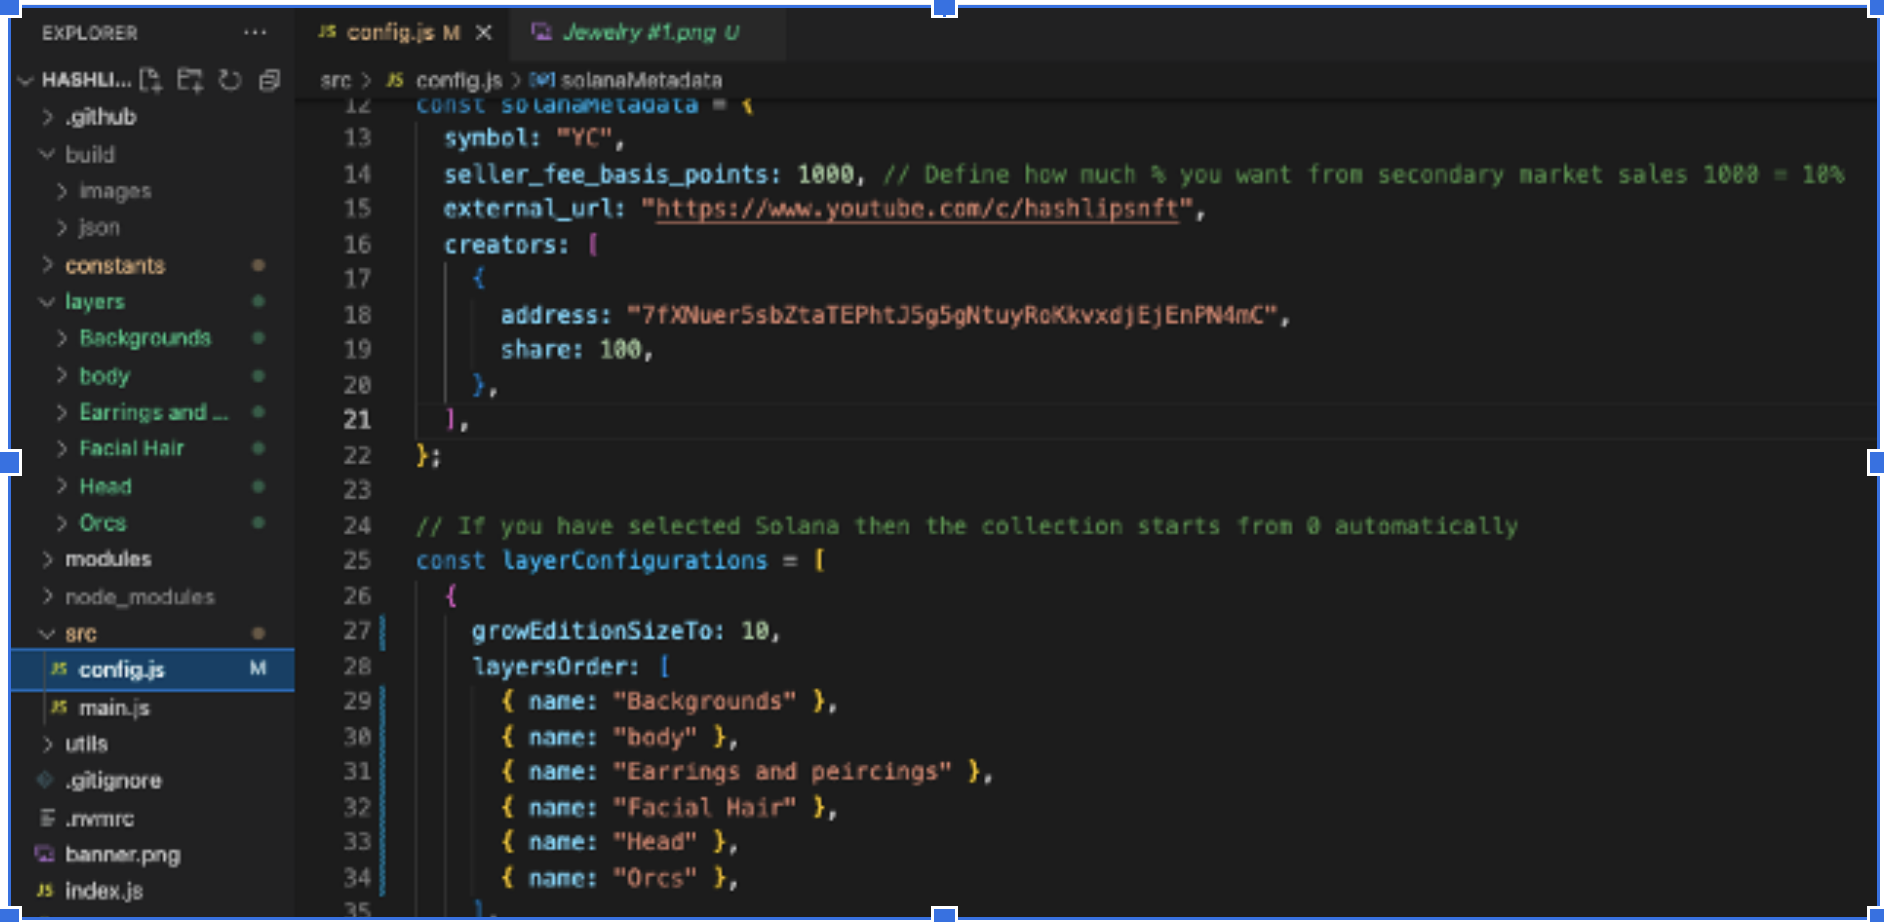
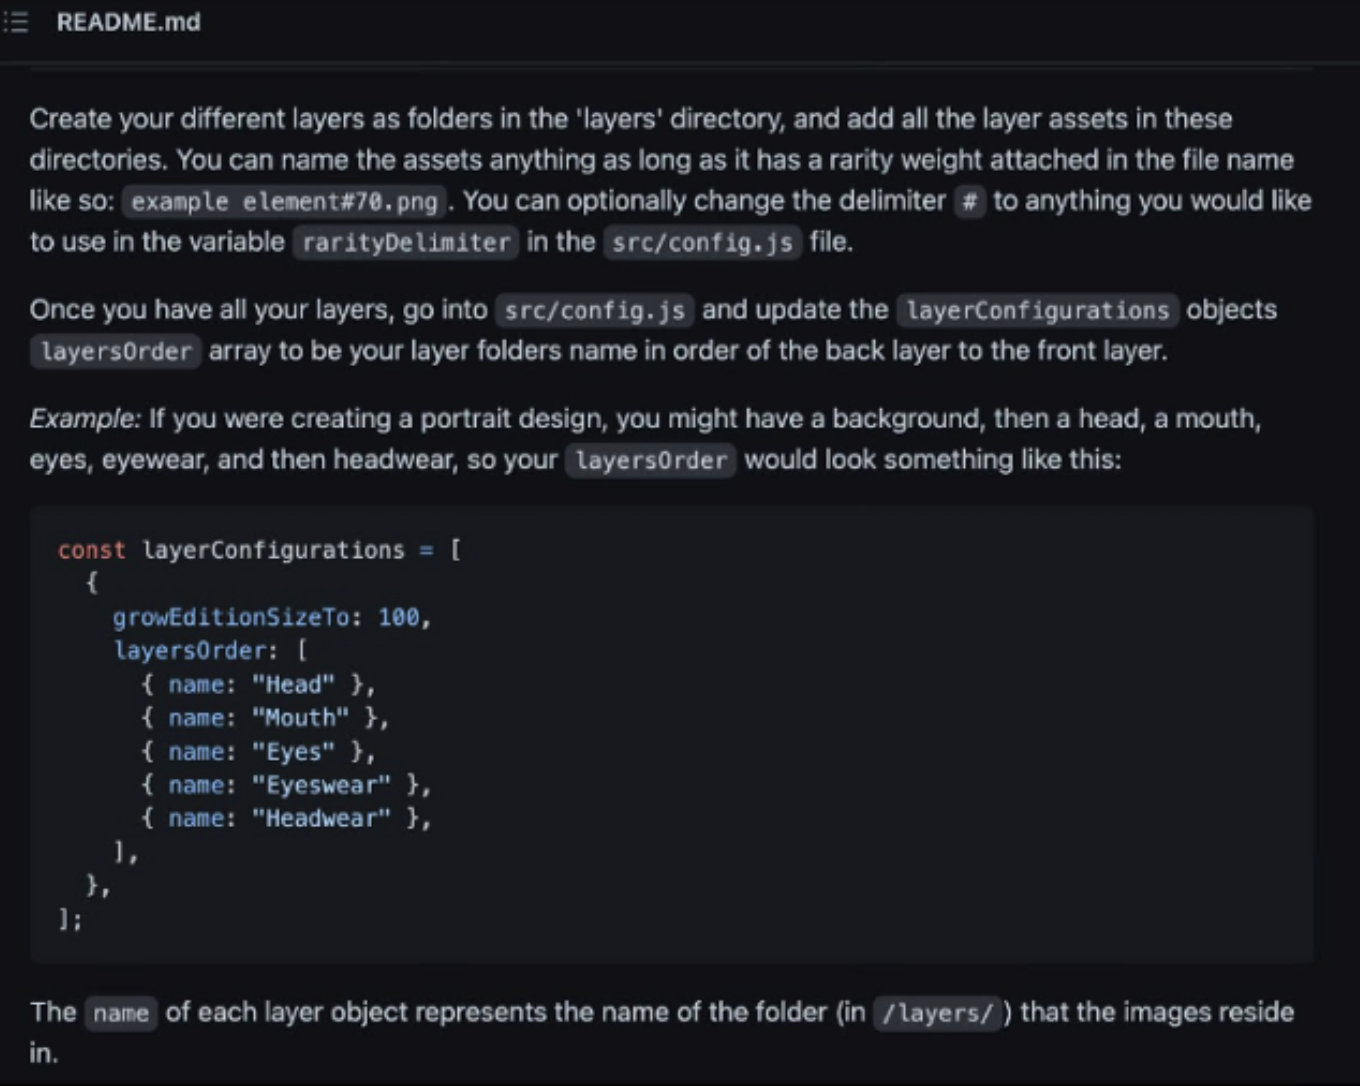
As clarified in the repository's ReadMe file, the code block under "layerConfigurations" is how we will input our custom images into the project.
This program collects images from the "Layers" folder containing the labeled .pngs we added and generates random combinations with them to make a final product.
Step 5
Add .pngs of layers to the Layers folder. You may reference the Orcs folder in the example below, which contains a sequence of Orc base layers in .png format.
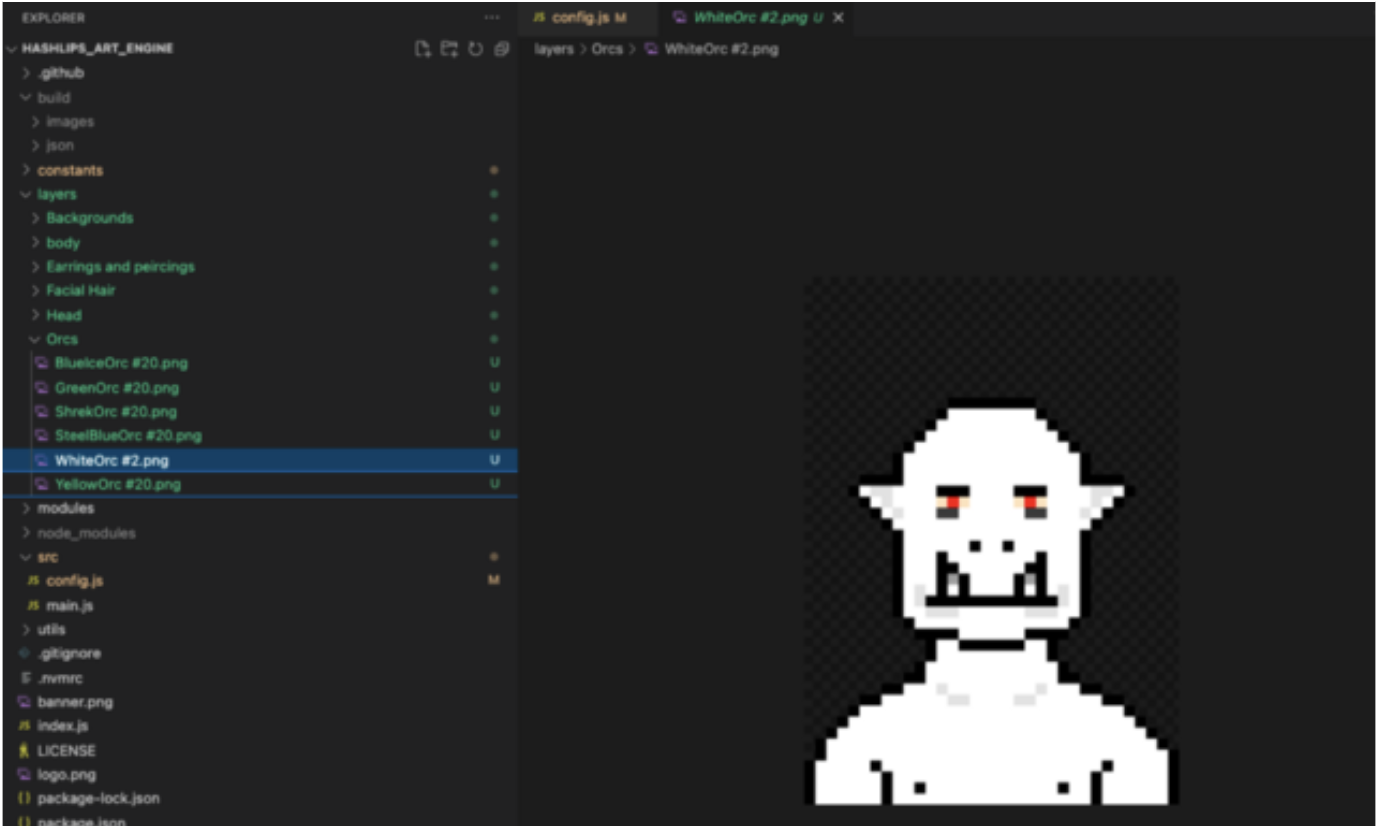
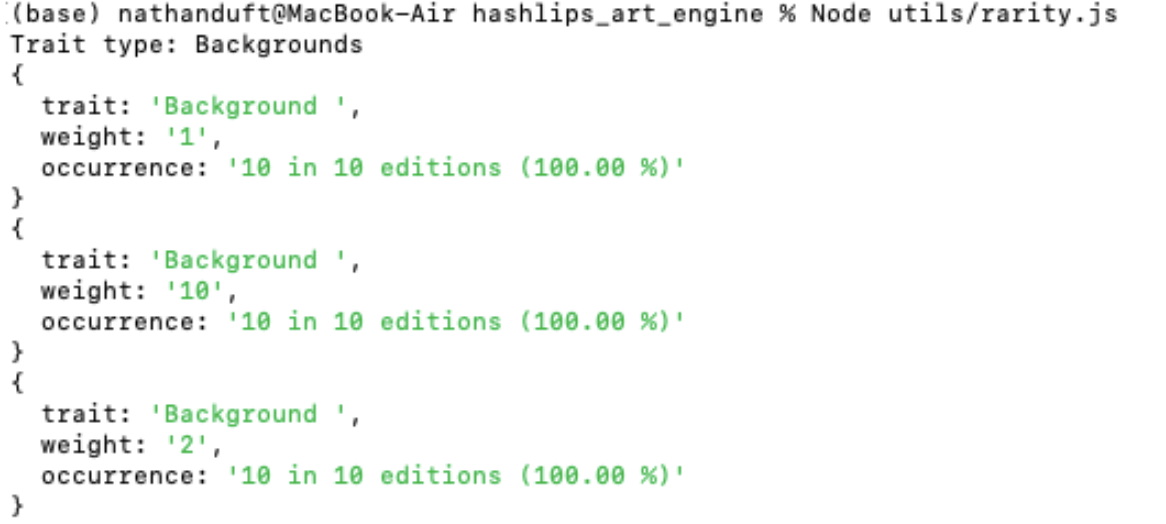
You may have noticed the "#" at the end of the file names. This character allows you to customize the rarities for your NFTs.
Rarity can be determined by adding up the "weights" for a specific folder, then dividing the value of one of them by that number. The higher the number, the more often your attribute will appear in the generated collection. The diagram above highlights the WhiteOrc as an example. Its weight has been set to 2, thus increasing its rarity.
Step 6
Once you have set up all your layers, the next step will be replacing them in the project. You can also use the source .pngs to test the program first.
Orc Layers
Step 7. Head over to config.js file code block “layerConfigurations” .
This is where you will change the names inside to match the names of your Layers. Don't forget to save changes after you edit the code!
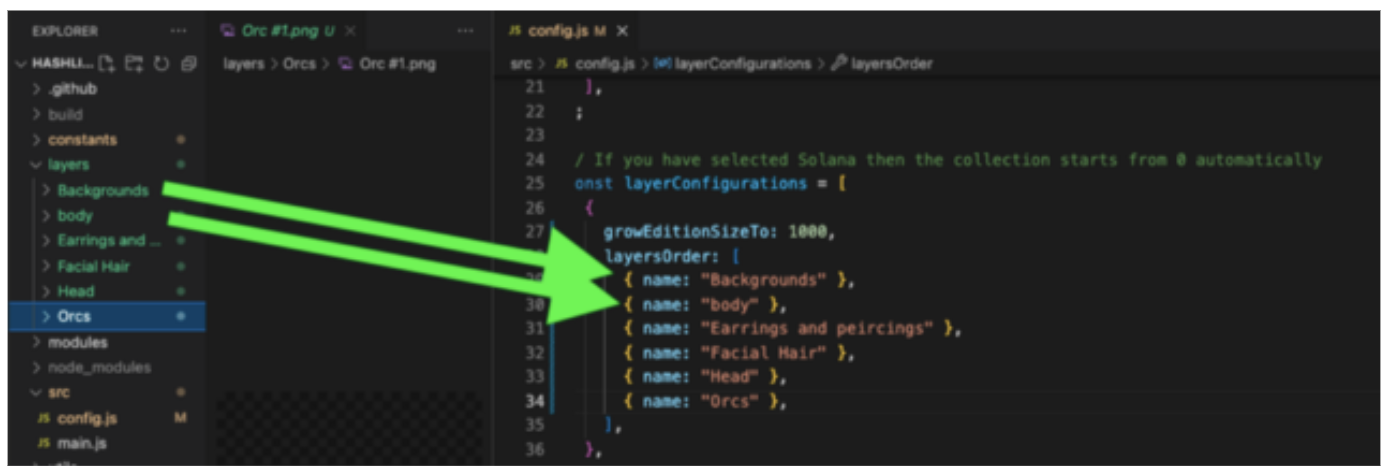 Note how each Layer folder corresponds to the Layers Order array of names.
Step 8
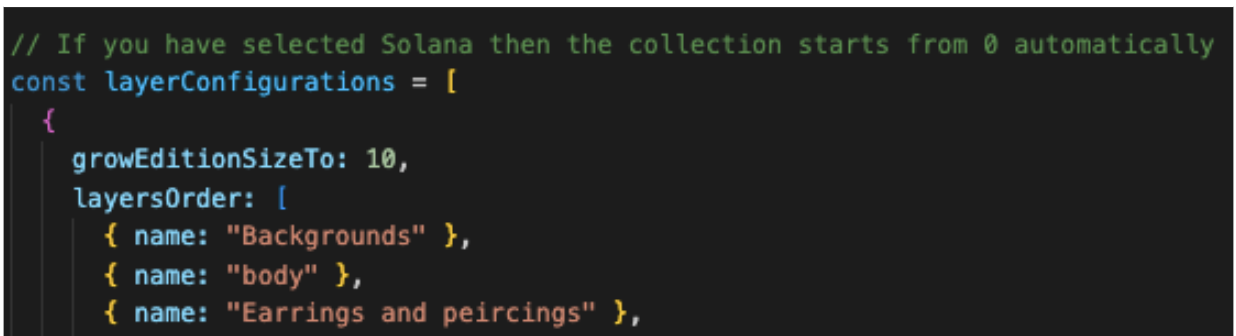
If you want to edit the amount of NFTs you create, then edit the growEditionSizeTo variable.
Step 9. It's now time to generate your collection!
Open a new terminal window using the project folder inside VS Code and make sure all dependencies are installed.
Yarn
Click on package.json to see all of the dependencies
Step 10
time for the fun part
This will install the project dependencies and prepare them for production.
"yarn build"
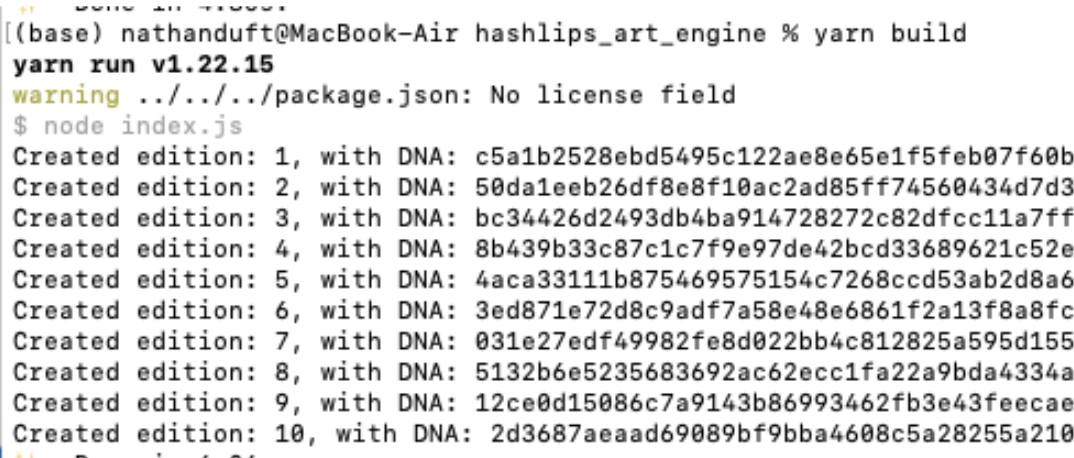
Go to the Build folder and check out the unique images and JSON metadata.
Step 11
If you are happy with your build, return to the terminal and type the following:
Step 12
This step involves simple changes to MetaData for project specification.
You can now set the namePrefix and description.
Step 13
Set up BaseURI by hosting images and JSON files for our NFTs in Pinata.
Set up a free account.
Click the blue "Upload" button, navigate to your project folder, open build, and submit the images folder.
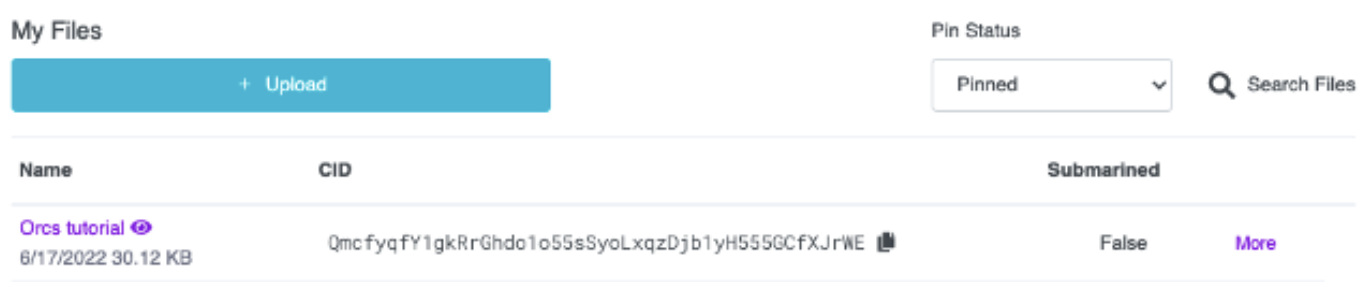
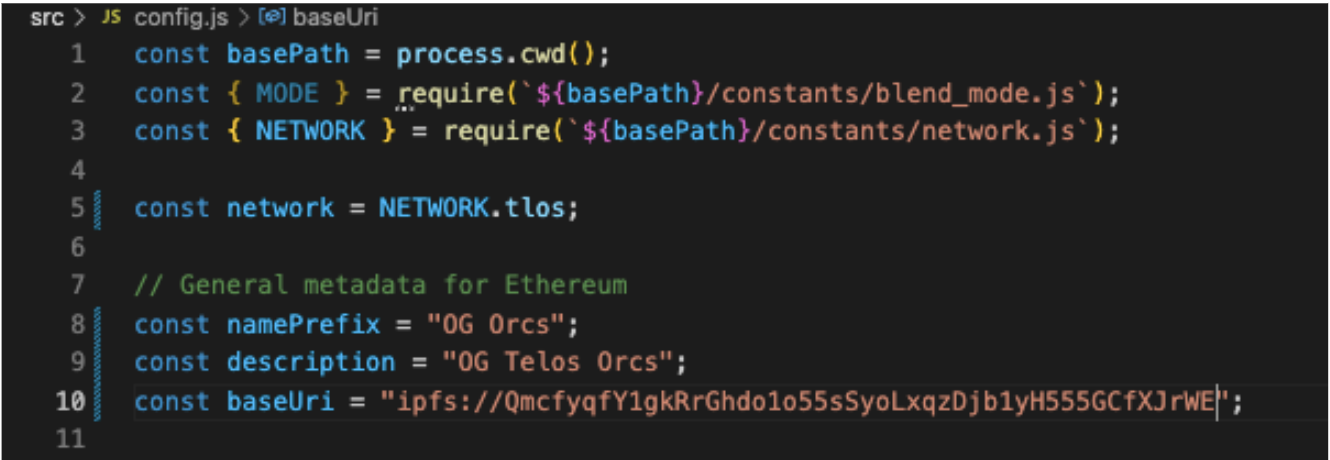
Save the CID and return to VS code under the Metadata section.
For baseURI, enter:
"ipfs://YOURCIDHERE>"mine is: ipfs://QmcfyqfY1gkRrGhdo1o55sSyoLxqzDjb1yH555GCfXJrWE
This makes every NFT's metadata point to the correct CID of where the images are hosted.
Step 14
Repeat the same process for uploading the images folder to pinata, but use the JSON folder this time.

Step 15
ERC721 Smart Contract
In this section, we will use OpenZeppelins Contract Wizard and Remix.
Keep the Pinata tab open to navigate back for CID.
Click here for the contract.
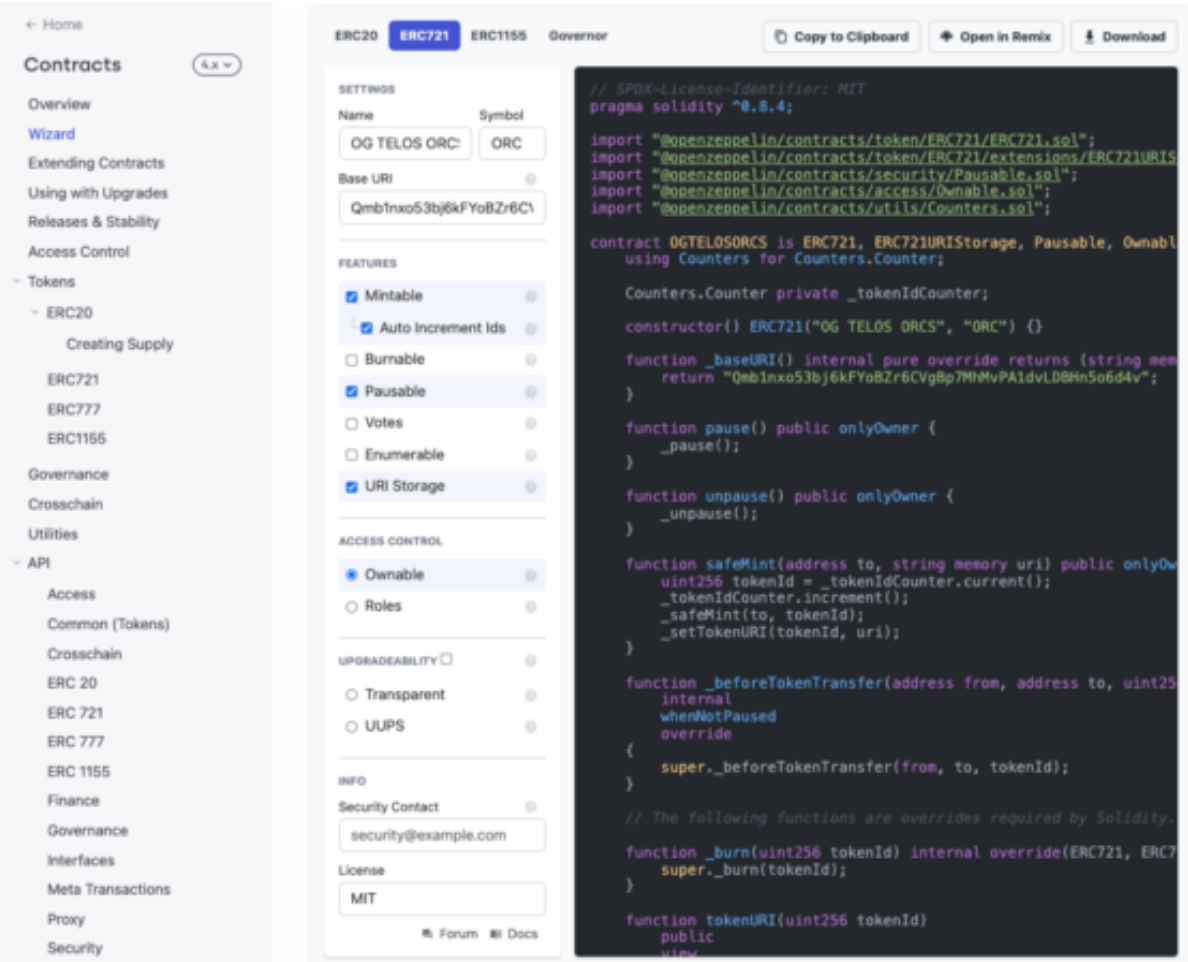
- As you will see, this ERC721 contract will enable users to mint NFTs connected to metadata to prove ownership of that .png on the blockchain.
- This is a standard NFT contract. Additional utils and features in the OpenZeppelin library allows users to unlock more creative ideas.
Step 16
Head to Remix IDE
Click here to access Remix.
This is where we will use the smart contract to communicate with the blockchain for the deployment of our NFTs.
Step 17
Copy and paste the Solidity code from OpenZeppelin Wizard and paste it into a file under the contracts folder.
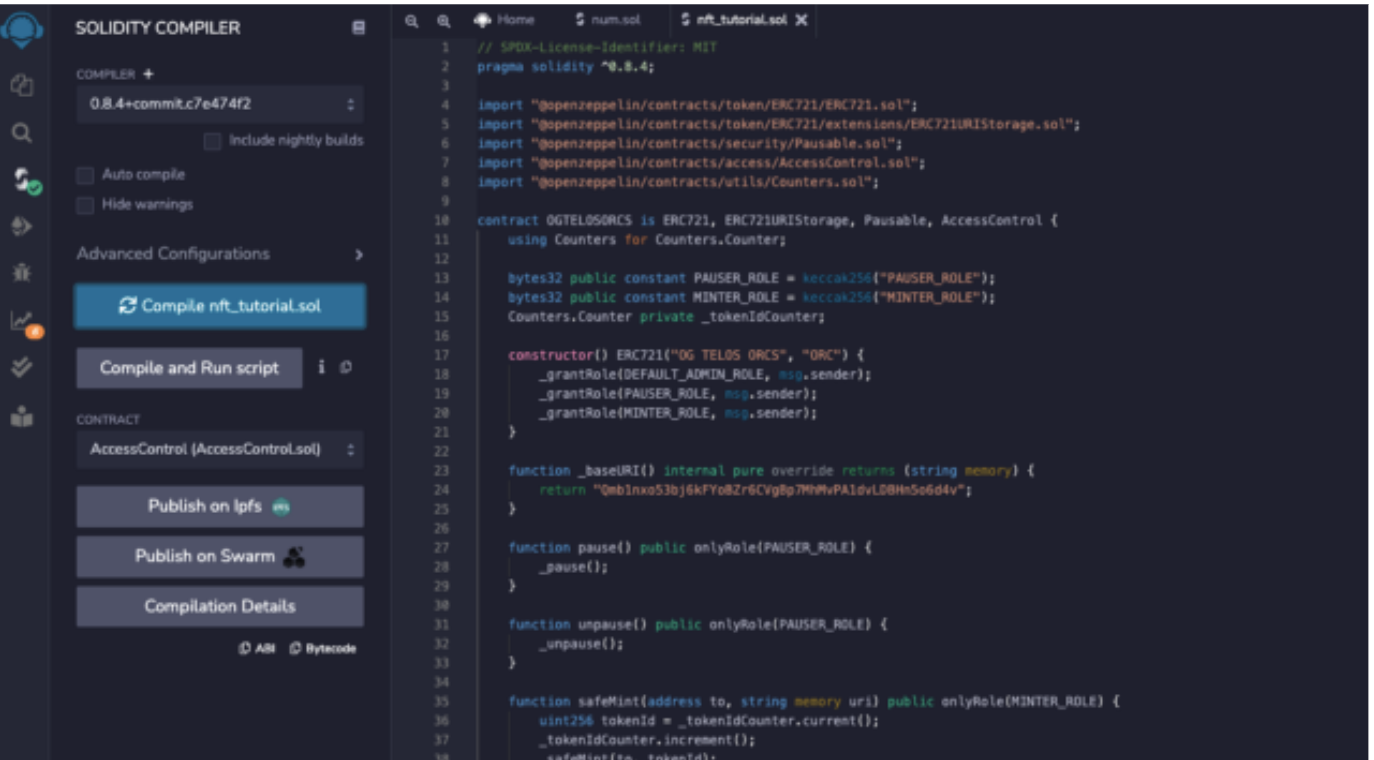
Make sure to enter metadata in compile under baseURI enter CID
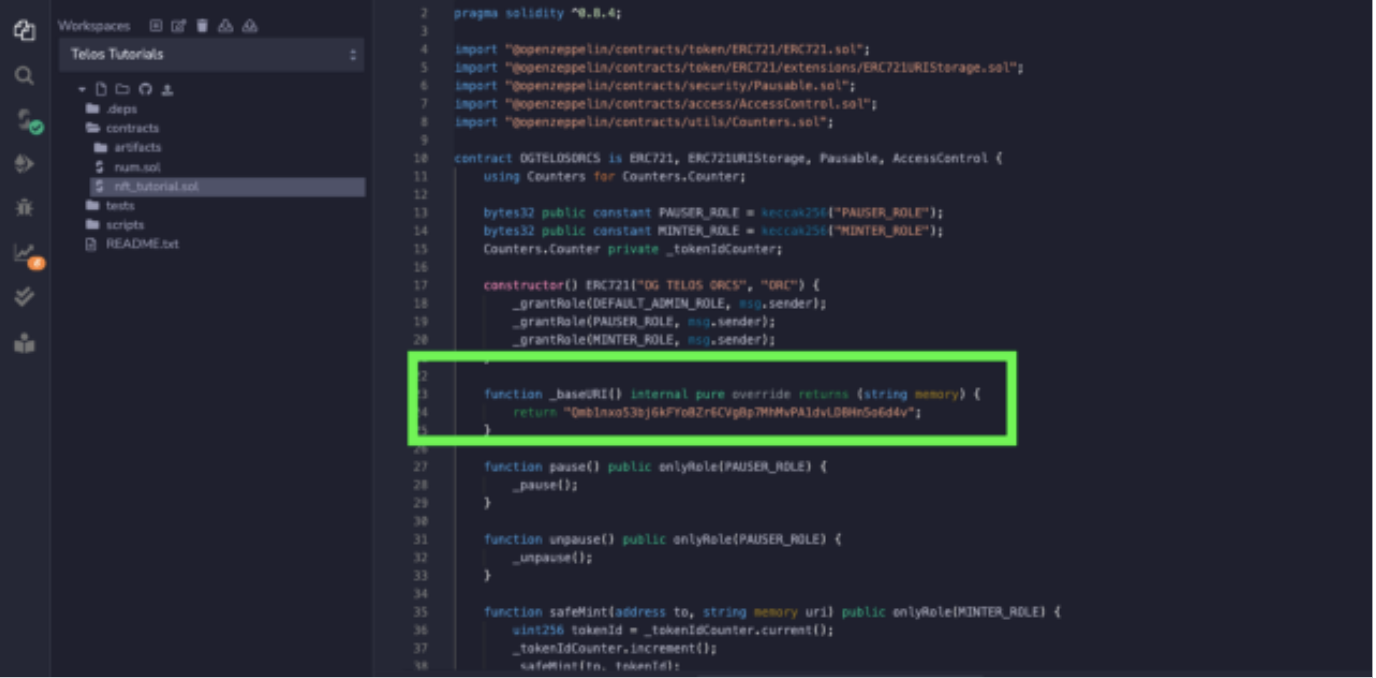
Step 18
Click the S button on the side to compile the Solidity code into Byte code for the EVM to read.
- Make sure compile is the same version as stated in the solidity file after pragma.
- Click the blue compile button.
Step 19
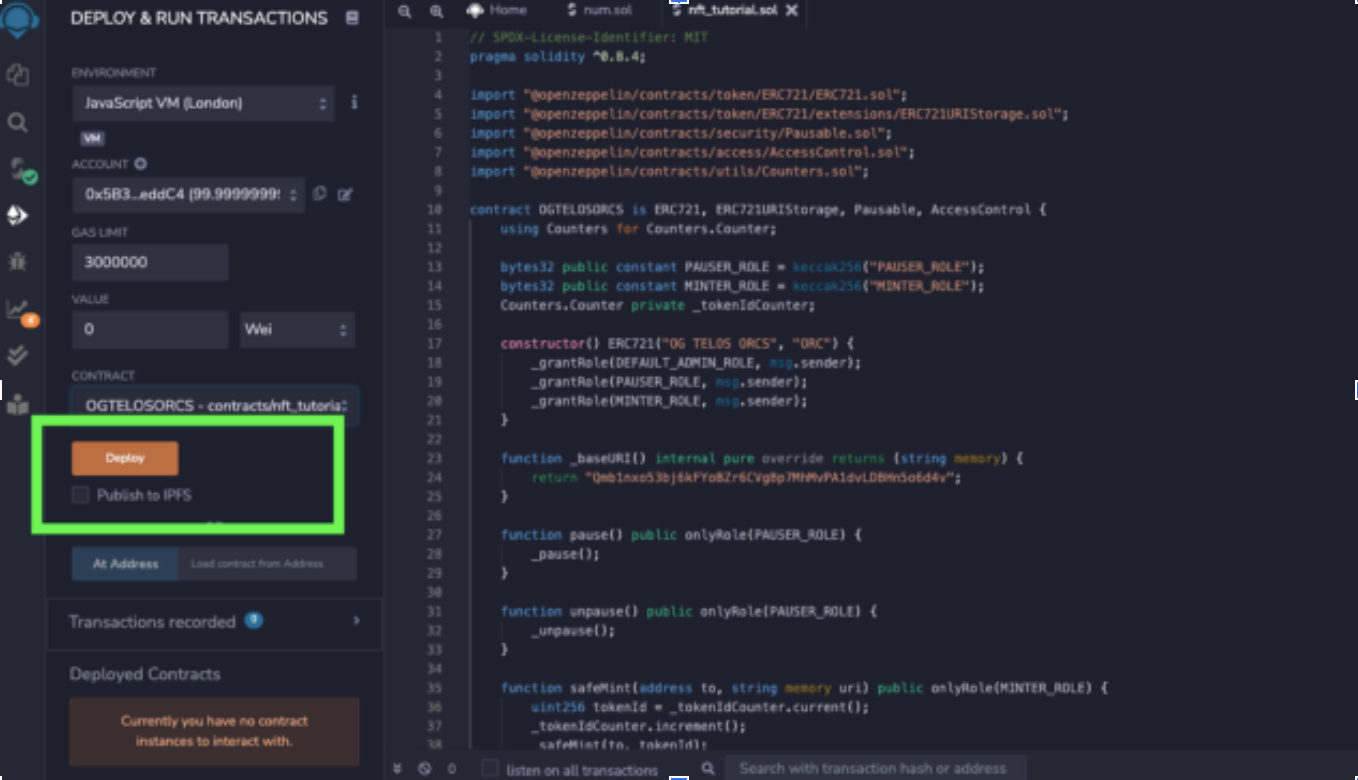
Deploy
Voila! Your dynamic NFT collection should be successfully created, and you will likely be more familiar with solidity and deploying as a result of this process.
Our upcoming documentation will contain more information regarding minting methods, including different ERC721 contract add-ons and utilities. It will also include a front-end minting dApp boilerplate.
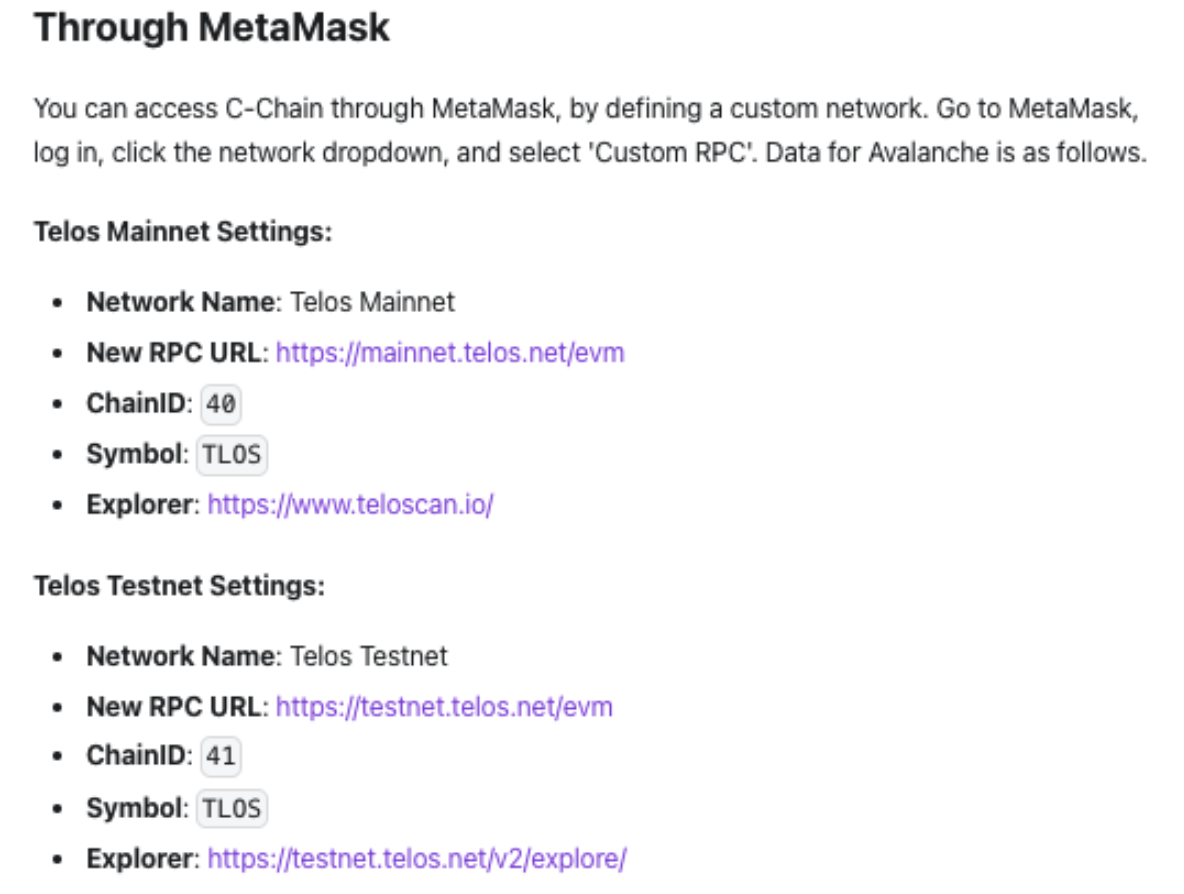
If you wish to deploy on the Telos network, connect to RPC on Metamask, then use Injected Web3 by inputting the following information:
We hope you enjoy creating your NFT collection with Telos, and we wish all participants the best of luck! Remember, we always stand by to assist you with the process in our Telegram and Discord!